Tuesday, December 22, 2020

NPM - Node Package Manager

 Node Package Manager (NPM) is a command line tool that installs, updates or uninstalls Node.js packages in your application. It is also an online repository for open-source Node.js packages. The node community around the world creates useful modules and publishes them as packages in this repository.

It has now become a popular package manager for other open-source JavaScript frameworks like AngularJS, jQuery, Gulp, Bower etc.

Official website: https://www.npmjs.com

NPM is included with Node.js installation. After you install Node.js, verify NPM installation by writing the following command in terminal or command prompt.

C:\> npm -v
2.11.3

If you have an older version of NPM then you can update it to the latest version using the following command.

C:\> npm install npm -g

To access NPM help, write npm help in the command prompt or terminal window.

C:\> npm help

NPM performs the operation in two modes: global and local. In the global mode, NPM performs operations which affect all the Node.js applications on the computer whereas in the local mode, NPM performs operations for the particular local directory which affects an application in that directory only.

Install Package Locally

Use the following command to install any third party module in your local Node.js project folder.

C:\>npm install <package name>

For example, the following command will install ExpressJS into MyNodeProj folder.

C:\MyNodeProj> npm install express

All the modules installed using NPM are installed under node_modules folder. The above command will create ExpressJS folder under node_modules folder in the root folder of your project and install Express.js there.

Add Dependency into package.json

Use --save at the end of the install command to add dependency entry into package.json of your application.

For example, the following command will install ExpressJS in your application and also adds dependency entry into the package.json.

C:\MyNodeProj> npm install express --save

The package.json of NodejsConsoleApp project will look something like below.

package.json
{
  "name": "NodejsConsoleApp",
  "version": "0.0.0",
  "description": "NodejsConsoleApp",
  "main": "app.js",
  "author": {
    "name": "Dev",
    "email": ""
  },
  "dependencies": {
    "express": "^4.13.3"
  }
}

Install Package Globally

NPM can also install packages globally so that all the node.js application on that computer can import and use the installed packages. NPM installs global packages into /<User>/local/lib/node_modules folder.

Apply -g in the install command to install package globally. For example, the following command will install ExpressJS globally.

C:\MyNodeProj> npm install -g express

Update Package

To update the package installed locally in your Node.js project, navigate the command prompt or terminal window path to the project folder and write the following update command.

C:\MyNodeProj> npm update <package name>

The following command will update the existing ExpressJS module to the latest version.

C:\MyNodeProj> npm update express

Uninstall Packages

Use the following command to remove a local package from your project.

C:\>npm uninstall <package name>

The following command will uninstall ExpressJS from the application.

C:\MyNodeProj> npm uninstall express

Visit docs.npmjs.com for more information on Node Package Manager.

Node.js Module

 Module in Node.js is a simple or complex functionality organized in single or multiple JavaScript files which can be reused throughout the Node.js application.

Each module in Node.js has its own context, so it cannot interfere with other modules or pollute global scope. Also, each module can be placed in a separate .js file under a separate folder.

Node.js implements CommonJS modules standard. CommonJS is a group of volunteers who define JavaScript standards for web server, desktop, and console application.

Node.js Module Types

Node.js includes three types of modules:

  1. Core Modules
  2. Local Modules
  3. Third Party Modules

Node.js Core Modules

Node.js is a light weight framework. The core modules include bare minimum functionalities of Node.js. These core modules are compiled into its binary distribution and load automatically when Node.js process starts. However, you need to import the core module first in order to use it in your application.

The following table lists some of the important core modules in Node.js.

Core ModuleDescription
httphttp module includes classes, methods and events to create Node.js http server.
urlurl module includes methods for URL resolution and parsing.
querystringquerystring module includes methods to deal with query string.
pathpath module includes methods to deal with file paths.
fsfs module includes classes, methods, and events to work with file I/O.
utilutil module includes utility functions useful for programmers.

Loading Core Modules

In order to use Node.js core or NPM modules, you first need to import it using require() function as shown below.

var module = require('module_name');

As per above syntax, specify the module name in the require() function. The require() function will return an object, function, property or any other JavaScript type, depending on what the specified module returns.

The following example demonstrates how to use Node.js http module to create a web server.

Example: Load and Use Core http Module
var http = require('http');

var server = http.createServer(function(req, res){

  //write code here

});

server.listen(5000); 

In the above example, require() function returns an object because http module returns its functionality as an object, you can then use its properties and methods using dot notation e.g. http.createServer().

In this way, you can load and use Node.js core modules in your application. We will be using core modules throughout these tutorials.

Learn about local modules in the next section.

Node.js Basics

 Node.js supports JavaScript. So, JavaScript syntax on Node.js is similar to the browser's JavaScript syntax.

Visit JavaScript section to learn about JavaScript syntax in detail.

Primitive Types

Node.js includes following primitive types:

  • String
  • Number
  • Boolean
  • Undefined
  • Null
  • RegExp

Everything else is an object in Node.js.

Loose Typing

JavaScript in Node.js supports loose typing like the browser's JavaScript. Use var keyword to declare a variable of any type.

Object Literal

Object literal syntax is same as browser's JavaScript.

Example: Object
var obj = {
    authorName: 'Ryan Dahl',
    language: 'Node.js'
}

Functions

Functions are first class citizens in Node's JavaScript, similar to the browser's JavaScript. A function can have attributes and properties also. It can be treated like a class in JavaScript.

Example: Function
function Display(x) { 
    console.log(x);
}

Display(100);

Buffer

Node.js includes an additional data type called Buffer (not available in browser's JavaScript). Buffer is mainly used to store binary data, while reading from a file or receiving packets over the network.

process object

Each Node.js script runs in a process. It includes process object to get all the information about the current process of Node.js application.

The following example shows how to get process information in REPL using process object.

> process.execPath
'C:\\Program Files\\nodejs\\node.exe'
> process.pid
1652
> process.cwd()
'C:\\'

Defaults to local

Node's JavaScript is different from browser's JavaScript when it comes to global scope. In the browser's JavaScript, variables declared without var keyword become global. In Node.js, everything becomes local by default.

Access Global Scope

In a browser, global scope is the window object. In Node.js, global object represents the global scope.

To add something in global scope, you need to export it using export or module.export. The same way, import modules/object using require() function to access it from the global scope.

For example, to export an object in Node.js, use exports.name = object.

Example:
exports.log = {
    console: function(msg) {
        console.log(msg);
    },
    file: function(msg) {
        // log to file here
      }
}

Now, you can import log object using require() function and use it anywhere in your Node.js project.

Learn about modules in detail in the next section.

Node.js Console - REPL

Node.js comes with virtual environment called REPL (aka Node shell). REPL stands for Read-Eval-Print-Loop. It is a quick and easy way to test simple Node.js/JavaScript code.

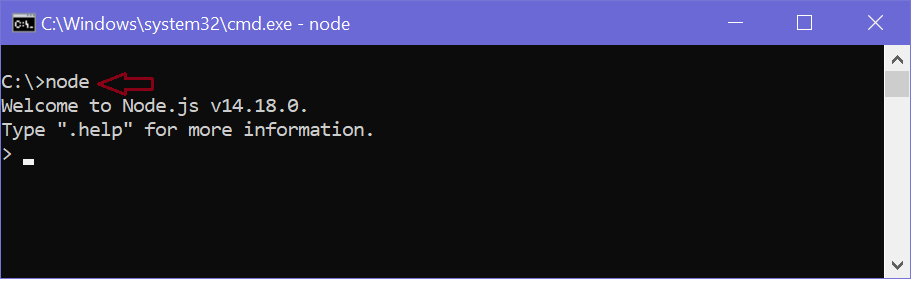
To launch the REPL (Node shell), open command prompt (in Windows) or terminal (in Mac or UNIX/Linux) and type node as shown below. It will change the prompt to > in Windows and MAC.

Launch Node.js REPL

You can now test pretty much any Node.js/JavaScript expression in REPL. For example, if your write "10 + 20" then it will display result 30 immediately in new line.

> 10 + 20
30

The + operator also concatenates strings as in browser's JavaScript.

> "Hello " + "World"
Hello World

You can also define variables and perform some operation on them.

> var x = 10, y = 20;
> x + y
30

If you need to write multi line JavaScript expression or function then just press Enter whenever you want to write something in the next line as a continuation of your code. The REPL terminal will display three dots (...), it means you can continue on next line. Write .break to get out of continuity mode.

For example, you can define a function and execute it as shown below.

Node.js Example in REPL

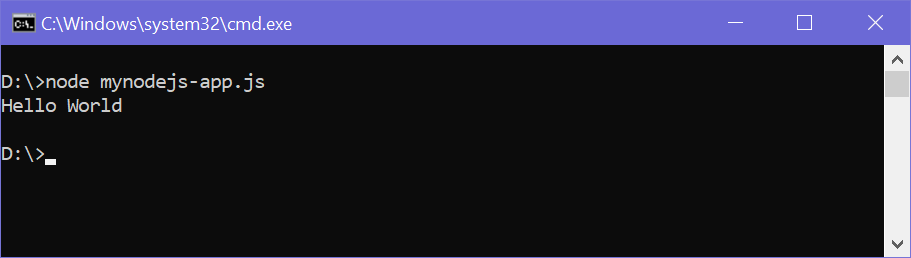
You can execute an external JavaScript file by writing node fileName command. For example, assume that node-example.js is on C drive of your PC with following code.

node-example.js
console.log("Hello World");

Now, you can execute node-exampel.js from command prompt as shown below.

Run External JavaScript file

To exit from the REPL terminal, press Ctrl + C twice or write .exit and press Enter.

Quit from REPL

Thus, you can execute any Node.js/JavaScript code in the node shell (REPL). This will give you a result which is similar to the one you will get in the console of Google Chrome browser.

 Note:
ECMAScript implementation in Node.js and browsers is slightly different. For example, {}+{} is '[object Object][object Object]' in Node.js REPL, whereas the same code is NaN in the Chrome console because of the automatic semicolon insertion feature. However, mostly Node.js REPL and the Chrome/Firefox consoles are similar.

The following table lists important REPL commands.

REPL CommandDescription
.helpDisplay help on all the commands
tab KeysDisplay the list of all commands.
Up/Down KeysSee previous commands applied in REPL.
.save filenameSave current Node REPL session to a file.
.load filenameLoad the specified file in the current Node REPL session.
ctrl + cTerminate the current command.
ctrl + c (twice)Exit from the REPL.
ctrl + dExit from the REPL.
.breakExit from multiline expression.
.clearExit from multiline expression.

Setup Node.js Development Environment

 In this section, you will learn about the tools required and steps to setup development environment to develop a Node.js application.

Node.js development environment can be setup in Windows, Mac, Linux and Solaris. The following tools/SDK are required for developing a Node.js application on any platform.

  1. Node.js
  2. Node Package Manager (NPM)
  3. IDE (Integrated Development Environment) or TextEditor

NPM (Node Package Manager) is included in Node.js installation since Node version 0.6.0., so there is no need to install it separately.

Install Node.js on Windows

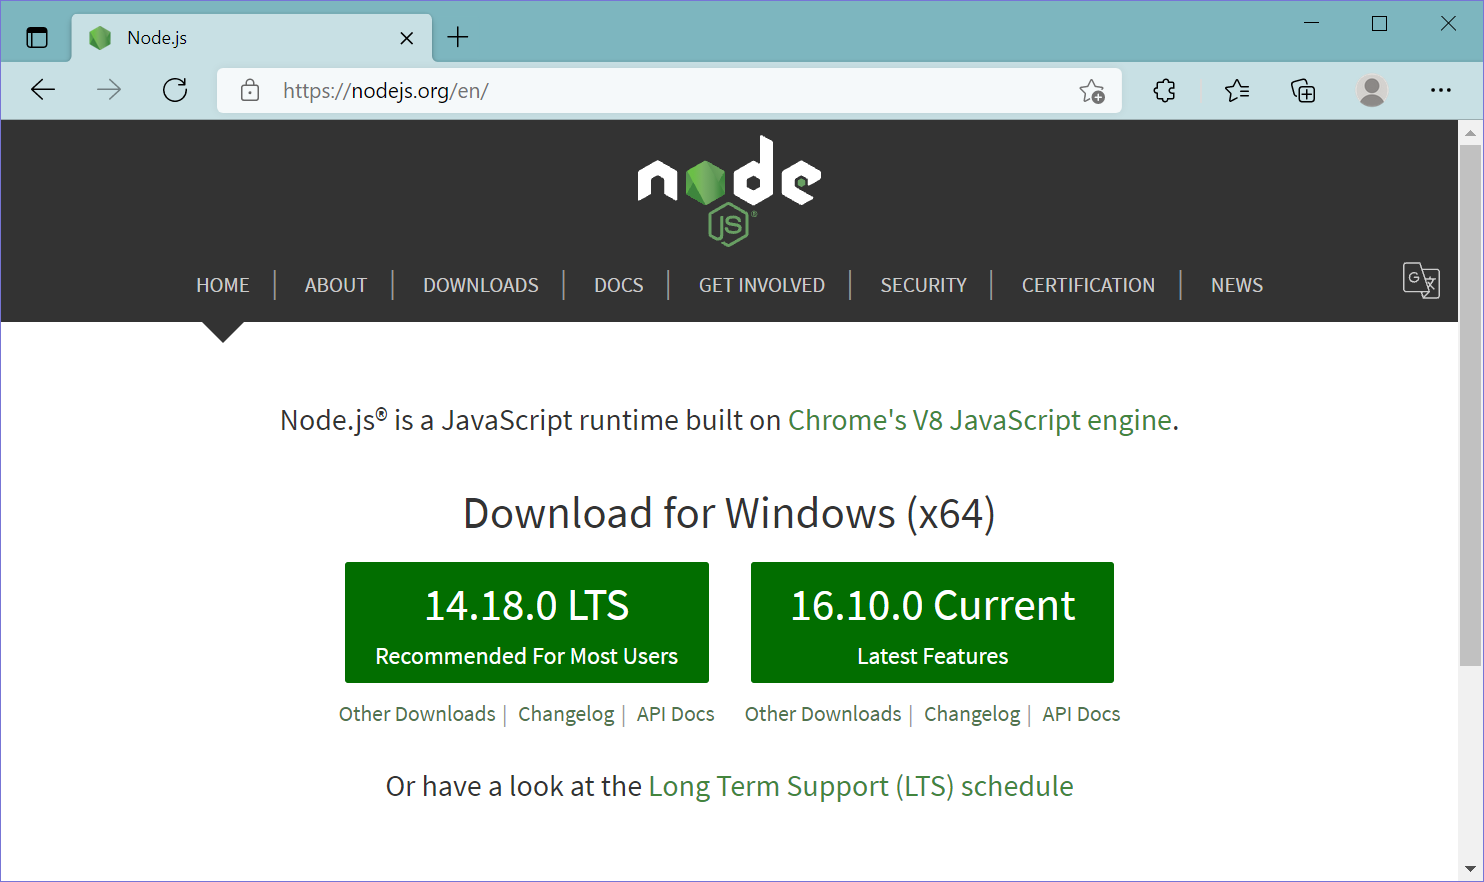
Visit Node.js official web site https://nodejs.org. It will automatically detect OS and display download link as per your Operating System. For example, it will display following download link for 64 bit Windows OS.

Download Node.JS Installer for Windows

Download node MSI for windows by clicking on 8.11.3 LTS or 10.5.0 Current button. We have used the latest version 10.5.0 for windows through out these tutorials.

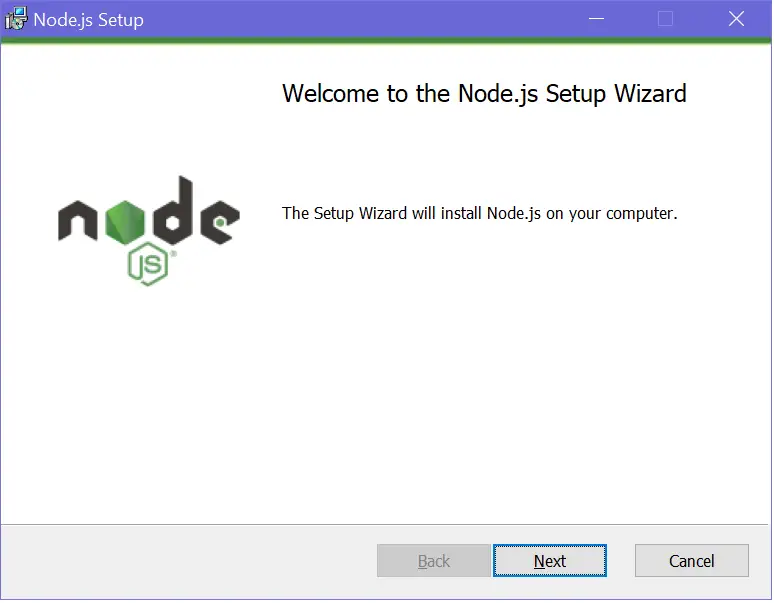
After you download the MSI, double-click on it to start the installation as shown below.

Node.js Installation

Click Next to read and accept the License Agreement and then click Install. It will install Node.js quickly on your computer. Finally, click finish to complete the installation.

Verify Installation

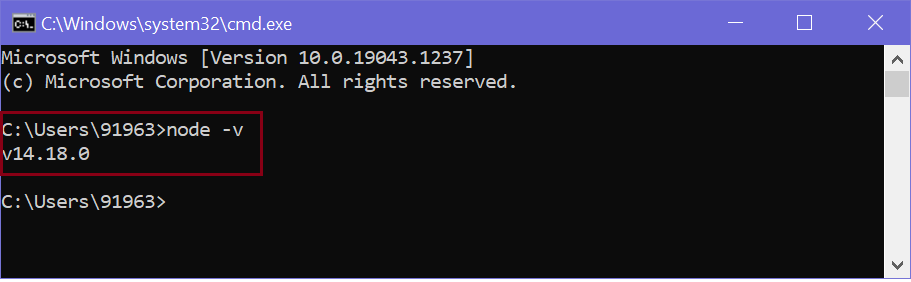
Once you install Node.js on your computer, you can verify it by opening the command prompt and typing node -v. If Node.js is installed successfully then it will display the version of the Node.js installed on your machine, as shown below.

Very Node.js Installation
Verify Node.js Installation
ADVERTISEMENT

Install Node.js on Mac/Linux

Visit Node.js official web site https://nodejs.org/en/download page. Click on the appropriate installer for Mac (.pkg or .tar.gz) or Linux to download the Node.js installer.

Node Environment Setup

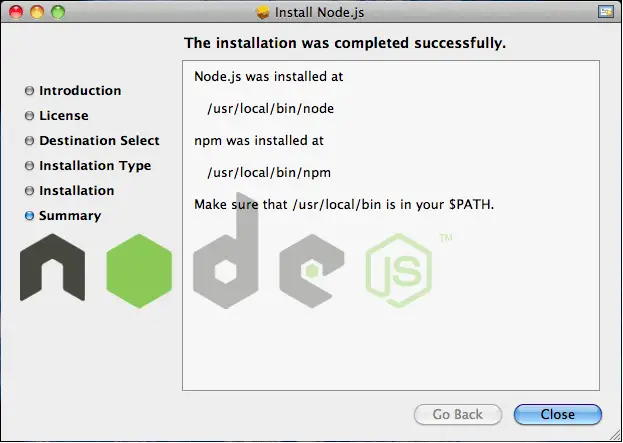
Once downloaded, click on the installer to start the Node.js installation wizard. Click on Continue and follow the steps. After successful installation, it will display summary of installation about the location where it installed Node.js and NPM.

Node.js Installation on OS X

After installation, verify the Node.js installation using terminal window and enter the following command. It will display the version number of Node.js installed on your Mac.

$ node -v

Optionally, for Mac or Linux users, you can directly install Node.js from the command line using Homebrew package manager for Mac OS or Linuxbrew package manager for Linux Operating System. For Linux, you will need to install additional dependencies, viz. Ruby version 1.8.6 or higher and GCC version 4.2 or higher before installing node.

$ brew install node

IDE

Node.js application uses JavaScript to develop an application. So, you can use any IDE or texteditor tool that supports JavaScript syntax. However, an IDE that supports auto complete features for Node.js API is recommended e.g. Visual Studio, Sublime text, Eclipse, Aptana etc.

Learn how to setup MS Visual Studio for Node.js development in the next section.

Node.js Process Model

In this section, we will learn about the Node.js process model and understand why we should use Node.js.

Traditional Web Server Model

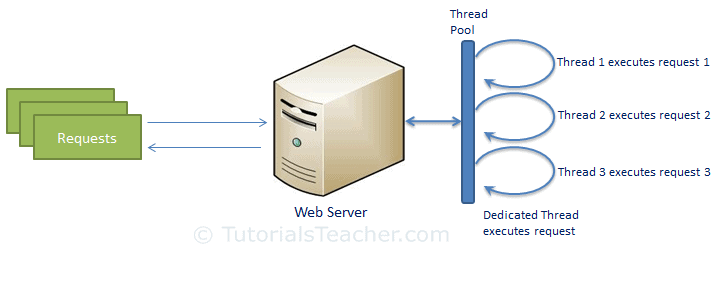
In the traditional web server model, each request is handled by a dedicated thread from the thread pool. If no thread is available in the thread pool at any point of time then the request waits till the next available thread. Dedicated thread executes a particular request and does not return to thread pool until it completes the execution and returns a response.

traditional web server model
Traditional Web Server Model

Node.js Process Model

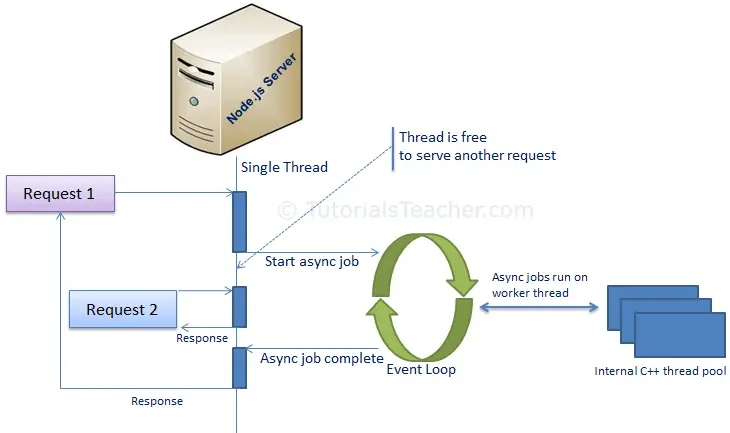
Node.js processes user requests differently when compared to a traditional web server model. Node.js runs in a single process and the application code runs in a single thread and thereby needs less resources than other platforms. All the user requests to your web application will be handled by a single thread and all the I/O work or long running job is performed asynchronously for a particular request. So, this single thread doesn't have to wait for the request to complete and is free to handle the next request. When asynchronous I/O work completes then it processes the request further and sends the response.

An event loop is constantly watching for the events to be raised for an asynchronous job and executing callback function when the job completes. Internally, Node.js uses libev for the event loop which in turn uses internal C++ thread pool to provide asynchronous I/O.

The following figure illustrates asynchronous web server model using Node.js.

node.js process model
Node.js Process Model

Node.js process model increases the performance and scalability with a few caveats. Node.js is not fit for an application which performs CPU-intensive operations like image processing or other heavy computation work because it takes time to process a request and thereby blocks the single thread.

Node.js Tutorials


Node.js is an open-source server side runtime environment built on Chrome's V8 JavaScript engine. 

It provides an event driven, non-blocking (asynchronous) I/O and cross-platform runtime environment for building highly scalable server-side applications using JavaScript.

Node.js can be used to build different types of applications such as commandline application, web application, real-time chat application, REST API server etc. However, it is mainly used to build network programs like web servers, similar to PHP, Java, or ASP.NET.

How Js Engine work in Client Side


Advantages of Node.js

  1. Node.js is an open-source framework under MIT license. (MIT license is a free software license originating at the Massachusetts Institute of Technology (MIT).)
  2. Uses JavaScript to build entire server side application.
  3. Lightweight framework that includes bare minimum modules. Other modules can be included as per the need of an application.
  4. Asynchronous by default. So it performs faster than other frameworks.
  5. Cross-platform framework that runs on Windows, MAC or Linux


Part 7 — Enterprise RAG Reference Architecture

  "Architecture is not about connecting components. It is about defining responsibilities that can evolve independently." Welcome ...